|
|
| MegaSceneryEarth - How To Add Scenery To
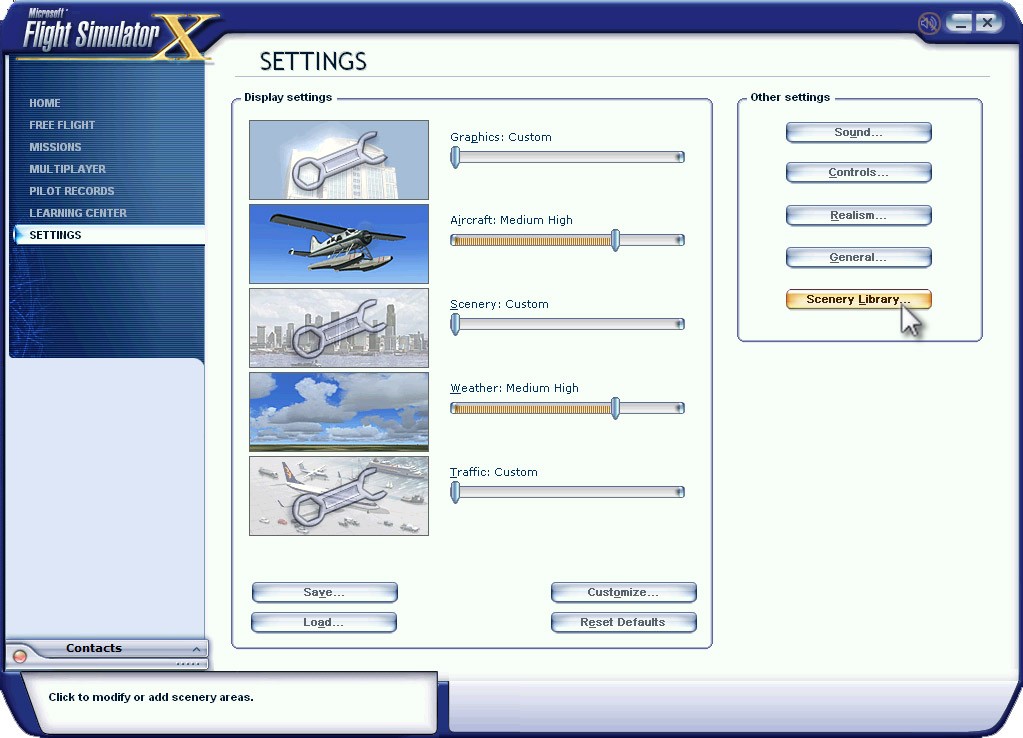
Your Scenery Library 1. Launch Microsoft Flight Simulator X 2. Select Settings
3. Select Scenery Library
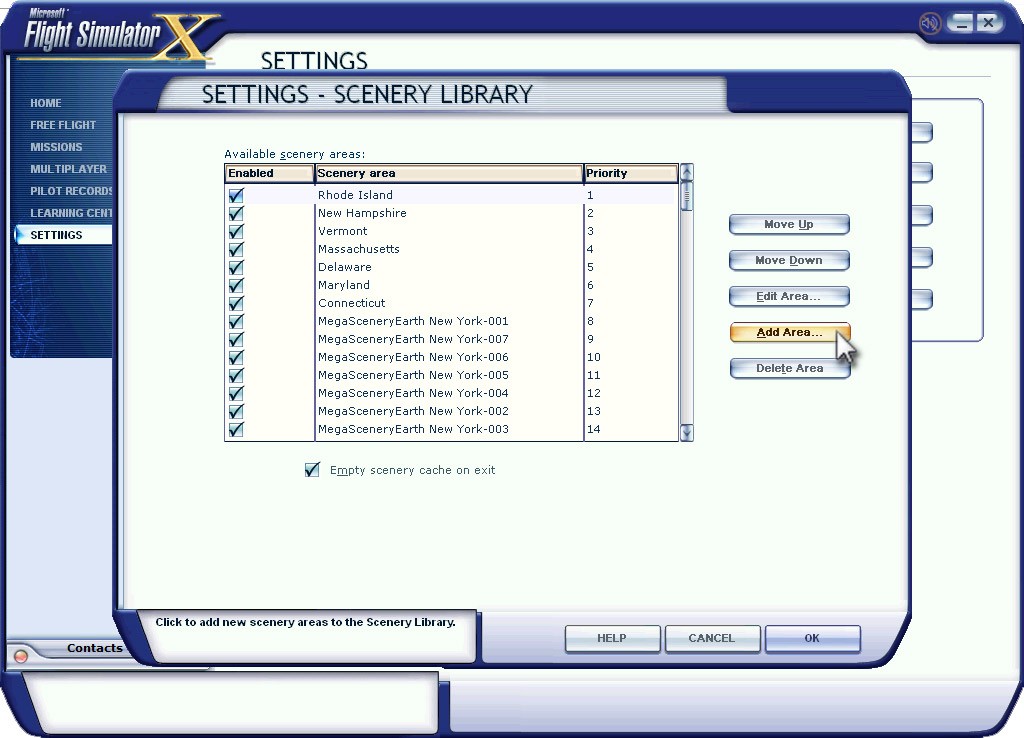
4. Select Add Area
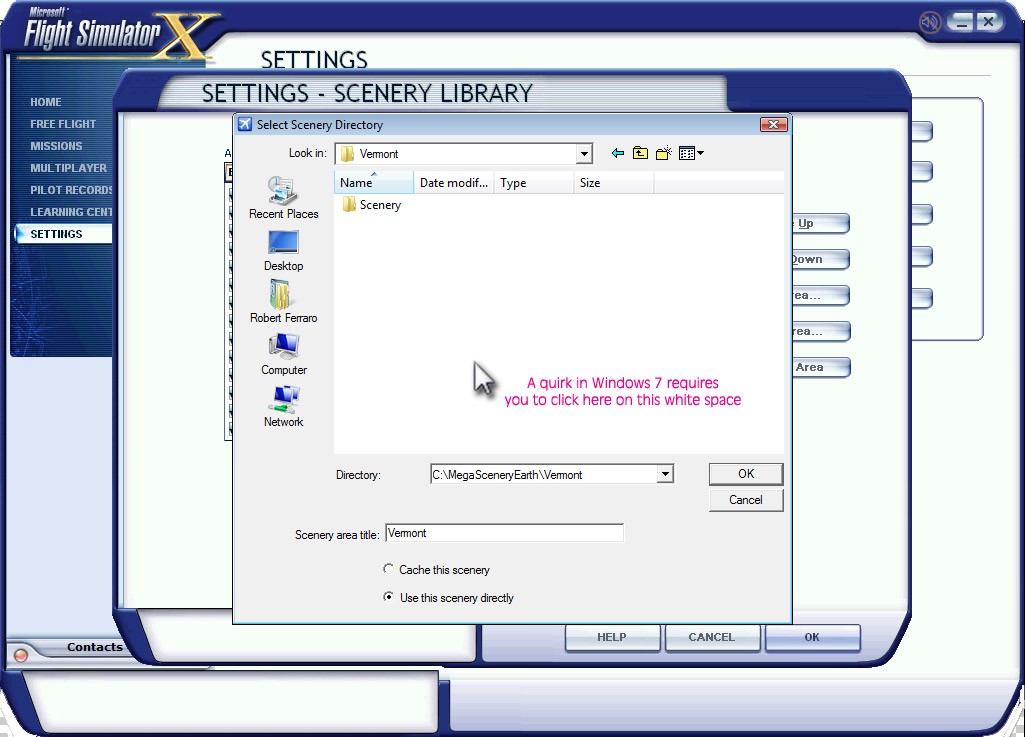
5. Navigate your directories and locate your MegaSceneryEarth folder - usually something like C:\MegaSceneryEarth or D:\MegaSceneryEarth. Then simply click on the area you want to add. In the example above it is Vermont. Then Select OK. IF YOU ARE USING WINDOWS 7, there is a little quirk that requires a small extra step. In Windows 7 you need to Click on the state and then click ok and then at the next screen you need to click on the white space and then click OK. It is simply a Windows 7 quirk that we need to get past. You can view a video on the Windows 7 issue here: http://iblueyonder.com/video-tutorial-adding-scenery-to-fsx-in-windows-7/
6. Then when you are back at the Scenery Library Screen, click OK and then wait a few moments as FSX updates its scenery library. Occasionally, you may not see an immediate response after clicking okay and it may seem your system is locked but just wait a few more moments as it is simply doing some processing. 7. Then to fly your scenery simply go into FREE FLIGHT and select an airport and go to that airport. Your MegaSceneryEarth Scenery will automatically display when you are in the area. |
| FOR ANY SUPPORT QUESTIONS You should have very few problems using MegaSceneryEarth. In the even that you do have additional questions or require assistance, please follow these links. E-MAIL CUSTOMER SUPPORT | MEGASCENERYEARTH TECHNICAL SUPPORT PAGES |
|
www.megasceneryearth.com |
|
© PC Aviator Inc. |